Ahhh quand ca nous tente pas ??!! On fait quoi???
On a pas le choix de faire a souper un moment donné!! Parce que vraiment ,les céréales et les toasts,ca fonctionne 1 ou 2 fois mais plus que ça ishhh!!
voici on idée sur le sujet!
Une pile de bonne chose qui se cuisine en un rien de temps!
De 1: viande au choix. Poulet, boulette, ect!!
De 2 : légume au choix. Pois frais ou congeler, mais frais ou congeler carotte, brocoli...vous comprenez!!
De 3: crème au choix. Champignon, célerie, brocoli...encore une fois vous comprenez!
De 4: Fromage...au choix!
On fait comment...de 1 a 4 on empile et on cuit a 375* jusqu’à la cuisson de la viande.
Bon appétit!

lundi 6 décembre 2010
dimanche 5 décembre 2010
Patate sucré vous dite?
Bonjour mes damoiselle au coeur perdu! ah bien que sous la neige ou la pluie nous revons de plage à perte de vue, rappelons nous que certain d'entre nous ,ce sable, il est littéralement à perte de vue
DONC, passons au chose sérieuse.
Recette de la journée;
Patate sucré au guimauve .Mouais.c'estais ma réaction aussi...mais après manger WAW!
Simple comme ca se peut pas et tellement pratique à faire comme accompagnement de n'importe quel viande ou encore dans les soirée POT LUCK ( tout le monde apporte un plat).
Donc on y va.
- Patate sucré ( comme voulue)
-Cassonade (ou si vous avez le coeur plus festoyant sirop d'érable)
-Guimauve ( quoique optionnelle car ce plat est TRÈS sucré)
De 1: Cuire les patates
De 2: Mettre les patates en purées.
De 3: Ajouter de la cassonade. Encore un fois c'Est une question de gout.
De 4: Versé le tout dans un plat en pirex et parsemé de guimauve
De 5: Grillé au four jusqu'à ce que les guimauves soit brunit .
Il est possible de changer de légume aussi suivant le même principe!
Navet , courge,carotte ect!!!
Et pour sauver de $ regarder dans la collection Artic garden; ils ont enormément de variétés de légume congeler.!!!
Bonne appétit!
mercredi 1 décembre 2010
Pâte rosé!
Qui dans sa vie ne s'est pas retrouvé devant des pate blanche pis de la sauce au tomate?
Recette que j'ai piqué de ma soeur il y a si longtemps! Mais encore aujourd'hui, je l'aime!Encore une fois, cette recette s'augmente et se diminueau gout!
Besoin de :
-canne de tomate
-ail
-huile d'olive
-oignon
-sucre
-creme ou lait evaporé ou lait ousi vous la voulez pas rosé bien rien!
On fait comment?:
De 1: Faire frire l'ail ds l'huile d'olive
De 2: Ajouter l'oignon et frire un peu plus.
De 3: Ajouter la canne de tomate
De 4: ajouter un peu de sucre( plus ou moins 1 ou 2 cuillère a table,vraiment juste au goût)
De 5: Laisser mijoter jusqu'a reduction voulue.Epais ou liquide.
De 6: Ajouter la crème brassé.
Salez et poivré au goût .Servir sur des pâtes. Ajouté des lanière de poulet grillé si voulue!!
Bonne appétit!!
dimanche 28 novembre 2010
Poulet dans une sauce aux fromages
Bon voici ma première idée!
La raison pourquoi j'aime cette recette,c'est qu'elle est de 1 à 50 personnes!!
Bref voici comment faire!
De 1- légumes au gout! Carotte ,choux fleur, brocoli, célerie...ect!
De 2- poitrine de poulet. Assez pour fournir tout le monde.(ici pour 3 enfants et moi c'Est 1 poitrine)
De 3- la sauce au fromage. Beurre, farine , lait ,1/2 tasse de crème sur et 1 tasse de fromage.
Comment faire? Simple! (pour une fois!)
Bouillir les légumes jusqu'à tendreté voulue.
Couper le poulet en petit morceaux.Cuire.
Pour la sauce:
Fondre le beurre
Ajouter la farine (un peu a la fois afin de former une pate coulante)
Puis le lait ( la quantité depends du volume de sauce voulue.Tout comme le beurre et la farine.)
Ensuite crème sur et le fromage.
Brasser jusqu'à épaissisement.
Assemblage: tout mettre dans un pot allant au four et gratiné le tout si voulue. Cuire 10 minute afin de faire fondre le fromage!!!
Bon appétit!
samedi 27 novembre 2010
Mission pour 2!
Il y a quelques jours, j'ai laissé partir ma moitié. Il ira pour 9 mois ,au combat , dans un pays ensablé!
C'est ma mission de resté ici et de m'assurer de la survie de nos 3 poulets. J'ai pas encore réussis à maintenir mes plantes en vies alors on verras bien pour les poulets....
Donc , premier objectif de mission; MANGER!
Il est très difficile pour nous les femmes de voir partir nos hommes et de ne pas vouloir sympatiser avec leurs alimentation. Il mange mal on mange mal. Un peu le meme prince pour les homme de femme enceinte. Elle mange beaucoup , il mange beaucoup.
BREF! J'ajouterais le plus souvent possible des recettes de mon moi-même ou prise sur le net,afin de facilité la vie et euhh...survivre!
Bonne Mission à toutes!!
vendredi 1 octobre 2010
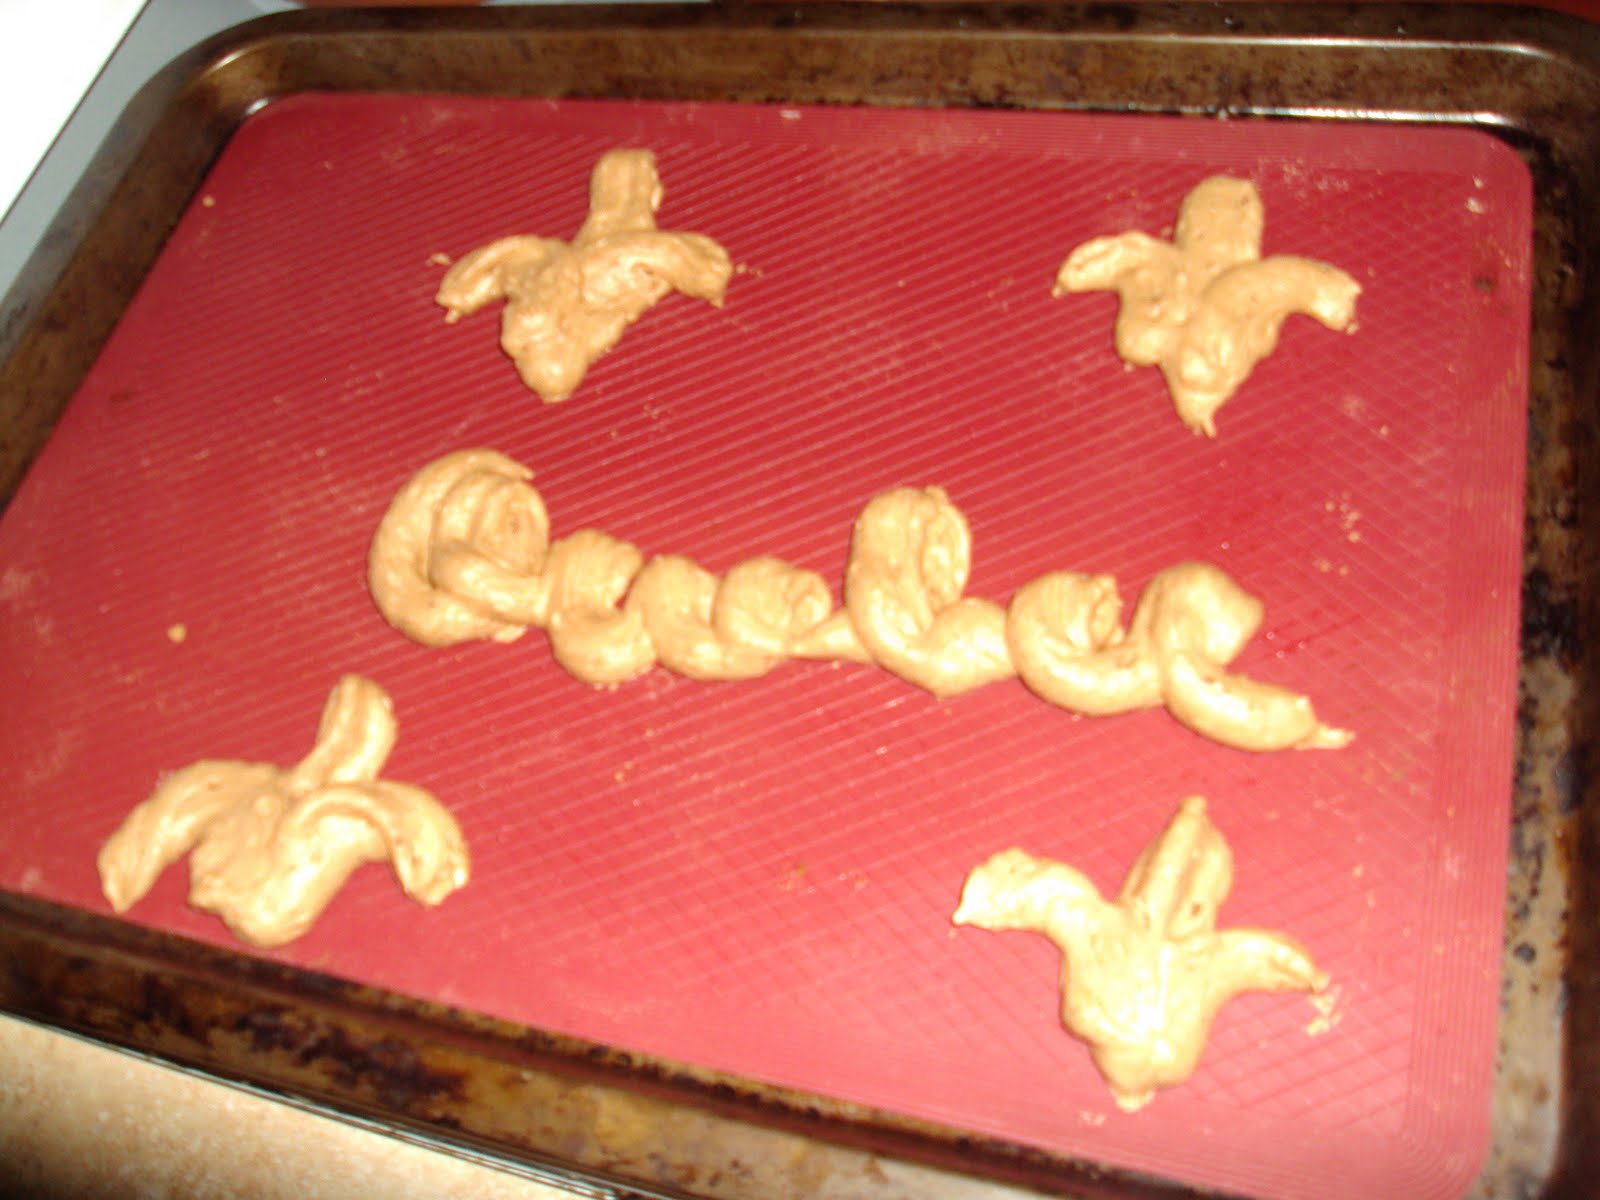
Daring Baker: COOKIES!
The September 2010 Daring Bakers’ challenge was hosted by Mandy of “What the Fruitcake?!” Mandy challenged everyone to make Decorated Sugar Cookies based on recipes from Peggy Porschen and The Joy of Baking.
OH wow ..I did it...it was fun! but humm problem here...evryone ate it before i could take a pic of it so..humm well it's was simple sugar cookies nicely decorated!
let's make it better for next one!!
OH wow ..I did it...it was fun! but humm problem here...evryone ate it before i could take a pic of it so..humm well it's was simple sugar cookies nicely decorated!
let's make it better for next one!!
mardi 27 juillet 2010
Daring Baker: Swiss BOMB
The July 2010 Daring Bakers’ challenge was hosted by Sunita of Sunita’s world – life and food. Sunita challenged everyone to make an ice-cream filled Swiss roll that’s then used to make a bombe with hot fudge. Her recipe is based on an ice cream cake recipe from Taste of Home.-

Swiss roll ice cream cake (inspired by the recipe of the same name from the Taste of Home website)
The Swiss rolls-
Preparation time- 10 minutes
Baking time- 10-12 minutes
Rolling and cooling time- at least 30 minutes
Filling-5-8 minutes
Filling and rolling- 5-10 minutes
Ingredients-
6 medium sized eggs
1 C / 225 gms caster sugar /8 oz+ extra for rolling
6 tblsp / 45gms/ a pinch over 1.5 oz of all purpose (plain) flour + 5 tblsp/40gm /a pinch under 1.5 oz of natural unsweetened cocoa powder, sifted together
2 tblsp /30ml / 1 fl oz of boiling water
a little oil for brushing the pans
For the filling-
2C / 500 mls/ 16 fl oz of whipping cream
1 vanilla pod, cut into small pieces of about ½ cm (or 1 tsp vanilla extract)
5 tblsp / 70gms/2.5oz of caster sugar
Method-
- Pre heat the oven at 200 deg C /400 deg F approximately. Brush the baking pans ( 11 inches by 9 inches ) with a little oil and line with greaseproof baking paper. If you have just one pan, bake one cake and then let the pan cool completely before using it for the next cake.
- In a large mixing bowl, add the eggs and sugar and beat till very thick; when the beaters are lifted, it should leave a trail on the surface for at least 10 seconds.
- Divide the mixture among the two baking pans and spread it out evenly, into the corners of the pans.
- Place a pan in the centre of the pre heated oven and bake for about 10-12 minutes or till the centre is springy to the touch.
- Spread a kitchen towel on the counter and sprinkle a little caster sugar over it.
- Turn the cake on to the towel and peel away the baking paper. Trim any crisp edges.
Starting from one of the shorter sides, start to make a
roll with the towel going inside. Cool the wrapped
roll on a rack, seam side down.
9. Repeat the same for the next cake as well.
10. Grind together the vanilla pieces and sugar in a food
processer till nicely mixed together. If you are using
vanilla extract, just grind the sugar on its own and
then add the sugar and extract to the cream.
11. In a large bowl, add the cream and vanilla-sugar
mixture and beat till very thick.
12. Divide the cream mixture between the
completely cooled cakes.
13. Open the rolls and spread the cream
mixture, making sure it does not go right to
the edges (a border of ½ an inch should be
fine).
14. Roll the cakes up again, this time without the towel.
Wrap in plastic wrap and chill in the fridge till needed,
seam side down.
Vanilla Ice Cream
Preparation time: 5 minutes + freezing
I have made the ice cream without an ice cream maker.
Ingredients
2 and ½ C / 625 ml / 20 fl oz of whipping cream
1 vanilla bean, minced or 1 tsp/ 5 ml/ .15 fl oz vanilla extract
½ C / 115grams/ 4 oz of granulated sugar
Directions:
1. Grind together the sugar and vanilla in a food processor. In a mixing bowl, add the cream and vanilla –sugar mixture and whisk lightly till everything is mixed together. If you are using the vanilla extract, grind the sugar on its ownand then and the sugar along with the vanilla extract to the cream.
2. Pour into a freezer friendly container and freeze till firm around the edges. Remove from the freezer, beat till smooth and return to the freezer. Do this 3-4 times and then set completely.
Hot Fudge Sauce
Preparation time: 2 minutes
I made this just after adding the layer of vanilla ice cream to the cake.
Cooking time: 2 minutes
Ingredients:
1 C / 230 grams / 8 oz of caster sugar
3 TBS. / 24 grams /1.5 oz of natural unsweetened cocoa powder
2 TBS. /15 grams / 1 oz of corn flour/cornstarch
1 ½ C / 355 ml /12 fl oz of water
1 TBS. /14 grams/ 1 oz butter
1 tsp/ 5 ml / .15 fl oz vanilla extract
Directions:
1. In a small saucepan, whisk together the sugar,cocoa powder, corn flour and water.
2. Place the pan over heat, and stir constantly, till it begins to thicken and is smooth (for about 2 minutes).
3. Remove from heat and mix in the butter and vanilla. Keep aside to cool.
Chocolate Ice Cream
Preparation time: 5 minutes + freezing
Ingredients:
2 C / 500 ml whipping cream
1 C / 230 grams / 8 oz caster sugar
3 TBS. / 24 grams / 1.5 oz of natural unsweetened cocoa powder
Directions:
1. Grind together the sugar and the cocoa powder in a food processor.
2. In a saucepan, add all the ingredients and whisk lightly.
3. Place the pan over heat and keep stirring till it begins to bubble around the edges.
4. Remove from heat and cool completely before transferring to a freezer friendly container till firm around the edges. If you are using an ice cream maker, churn the ice cream according to the manufacturer’s instruction, after the mixture has cooled completely.
5. Remove from the freezer, beat till smooth and return to the freezer. Do this 3-4 times and then set completely.
Assembly:
1. Cut the Swiss rolls into 20 equal slices
(approximately 2 cms each).
2. Cover the bottom and sides of the bowl in
which you are going to set the dessert with
cling film/plastic wrap.
3. Arrange two slices at the bottom of the pan,
with their seam sides facing each other.
Arrange the Swiss roll slices up the bowl,
with the seam sides facing away from the
bottom, to cover the sides of the bowl.
Cover the bowl with plastic wrap and
freeze till the slices are firm (at least 30
minutes).
4. Soften the vanilla ice cream. Take the bowl out
of the freezer, remove the cling film cover
and add the ice cream on top of the cake slices. Spread it out to cover the bottom and sides of the bowl. Cover the bowl with plastic wrap and freeze till firm (at least 1 hour)
5. Add the fudge sauce over the vanilla ice
cream, cover and freeze till firm. (at least an
hour)
6. Soften the chocolate ice cream and spread it
over the fudge sauce. Cover with plastic wrap
and freeze for at least 4-5 hours till completely
set.
7. Remove the plastic cover, and place the
serving plate on top of the bowl. Turn it
upside down and remove the bowl and the
plastic lining. If the bowl does not come
away easily, wipe the outsides of the bowl
with a kitchen towel dampened with hot
water. The bowl will come away easily.
8. Keep the cake out of the freezer for at least
10 minutes before slicing, depending on
how hot your region is. Slice with a sharp
knife, dipped in hot water.
lundi 28 juin 2010
Daring Baker: Pavlova
The June 2010 Daring Bakers’ challenge was hosted by Dawn of Doable and Delicious. Dawn challenged the Daring Bakers’ to make Chocolate Pavlovas and Chocolate Mascarpone Mousse. The challenge recipe is based on a recipe from the book Chocolate Epiphany by Francois Payard
Here is my version of the Pavlova! I made my own mascarpone ! So fun and so easy that I could not pass an other opportunity!
It was sooooooooo delicious........Enjoy!


Here is my version of the Pavlova! I made my own mascarpone ! So fun and so easy that I could not pass an other opportunity!
It was sooooooooo delicious........Enjoy!

Please do notice that it is June and that i made it on My favorite national holiday!
ST JEAN BAPTISTE!
I did have fun with the meringue cookies...
oki oki the red background does NOT fit but hey the intention is still there!
Here goes for the recipie!
Recipe 1: Chocolate Meringue (for the chocolate Pavlova):
3 large egg whites
½ cup plus 1 tbsp (110 grams) white granulated sugar
¼ cup (30 grams) confectioner’s (icing) sugar
1/3 cup (30 grams) cocoa powder
½ cup plus 1 tbsp (110 grams) white granulated sugar
¼ cup (30 grams) confectioner’s (icing) sugar
1/3 cup (30 grams) cocoa powder
Directions:
- Place a rack in the center of the oven and preheat to 200º F (95º C) degrees. Line two baking sheets with silpat or parchment and set aside.
- Put the egg whites in a bowl and whip until soft peaks form. Increase speed to high and gradually add granulated sugar about 1 tbsp at a time until stiff peaks form. (The whites should be firm but moist.)
- Sift the confectioner’s sugar and cocoa powder over the egg whites and fold the dry ingredients into the white. (This looks like it will not happen. Fold gently and it will eventually come together.)
- Fill a pastry bag with the meringue. Pipe the meringue into whatever shapes you desire. Alternatively, you could just free form your shapes and level them a bit with the back of a spoon. (Class made rounds, hearts, diamonds and an attempt at a clover was made!)
- Bake for 2-3 hours until the meringues become dry and crisp. Cool and store in an airtight container for up to 3 days.
Recipe 2: Chocolate Mascarpone Mousse (for the top of the Pavlova base):
1 ½ cups (355 mls) heavy cream (cream with a milk fat content of between 36 and 40 percent)
grated zest of 1 average sized lemon
9 ounces (255 grams) 72% chocolate, chopped
1 2/3 cups (390 mls) mascarpone (don't forget we made this a few months ago - get the printable .pdfHERE)
pinch of nutmeg
2 tbsp (30 mls) Grand Marnier (or orange juice)
grated zest of 1 average sized lemon
9 ounces (255 grams) 72% chocolate, chopped
1 2/3 cups (390 mls) mascarpone (don't forget we made this a few months ago - get the printable .pdfHERE)
pinch of nutmeg
2 tbsp (30 mls) Grand Marnier (or orange juice)
Directions:
- Put ½ cup (120 mls) of the heavy cream and the lemon zest in a saucepan over medium high heat. Once warm, add the chocolate and whisk until melted and smooth. Transfer the mixture to a bowl and let sit at room temperature until cool.
- Place the mascarpone, the remaining cup of cream and nutmeg in a bowl. Whip on low for a minute until the mascarpone is loose. Add the Grand Marnier and whip on medium speed until it holds soft peaks. (DO NOT OVERBEAT AS THE MASCARPONE WILL BREAK.)
- Mix about ¼ of the mascarpone mixture into the chocolate to lighten. Fold in the remaining mascarpone until well incorporated. Fill a pastry bag with the mousse. Again, you could just free form mousse on top of the pavlova.
Recipe 3: Mascarpone Cream (for drizzling):
1 recipe crème anglaise
½ cup (120 mls) mascarpone
2 tbsp (30 mls) Sambucca (optional)
½ cup (120 mls) heavy cream
½ cup (120 mls) mascarpone
2 tbsp (30 mls) Sambucca (optional)
½ cup (120 mls) heavy cream
Directions:
Prepare the crème anglaise. Slowly whisk in the mascarpone and the Sambucca and let the mixture cool. Put the cream in a bowl and beat with electric mixer until very soft peaks are formed. Fold the cream into the mascarpone mixture.
Recipe 4: Crème Anglaise (a component of the Mascarpone Cream above):
1 cup (235 mls) whole milk
1 cup (235 mls) heavy cream
1 vanilla bean, split or 1 tsp pure vanilla extract
6 large egg yolks
6 tbsp (75 grams) sugar
1 cup (235 mls) heavy cream
1 vanilla bean, split or 1 tsp pure vanilla extract
6 large egg yolks
6 tbsp (75 grams) sugar
Directions:
- In a bowl, whisk together the egg yolks and sugar until the mixture turns pale yellow.
- Combine the milk, cream and vanilla in a saucepan over medium high heat, bringing the mixture to a boil. Take off the heat.
- Pour about ½ cup of the hot liquid into the yolk mixture, whisking constantly to keep from making scrambled eggs. Pour the yolk mixture into the pan with the remaining cream mixture and put the heat back on medium. Stir constantly with a wooden spoon until the mixture thickens enough to lightly coat the back of a wooden spoon. DO NOT OVERCOOK.
- Remove the mixture from the heat and strain it through a fine mesh sieve into a bowl. Cover and refrigerate until the mixture is thoroughly chilled, about 2 hours or overnight.
Assembly:
Pipe the mousse onto the pavlovas and drizzle with the mascarpone cream over the top. Dust with confectioner’s sugar and fresh fruit if desired.
Pipe the mousse onto the pavlovas and drizzle with the mascarpone cream over the top. Dust with confectioner’s sugar and fresh fruit if desired.
samedi 29 mai 2010
Daring Baker: Croqueenbouche!
The May 2010 Daring Bakers’ challenge was hosted by Cat of Little Miss Cupcake. Cat challenged everyone to make a piece montée, or croquembouche, based on recipes from Peter Kump’s Baking School in Manhattan and Nick Malgieri.


For the Vanilla Crème Patissiere (Half Batch)
1 cup (225 ml.) whole milk
2 Tbsp. cornstarch
6 Tbsp. (100 g.) sugar
1 large egg
2 large egg yolks
2 Tbsp. (30 g.) unsalted butter
1 Tsp. Vanilla
1 cup (225 ml.) whole milk
2 Tbsp. cornstarch
6 Tbsp. (100 g.) sugar
1 large egg
2 large egg yolks
2 Tbsp. (30 g.) unsalted butter
1 Tsp. Vanilla
Dissolve cornstarch in ¼ cup of milk. Combine the remaining milk with the sugar in a saucepan; bring to boil; remove from heat.
Beat the whole egg, then the yolks into the cornstarch mixture. Pour 1/3 of boiling milk into the egg mixture, whisking constantly so that the eggs do not begin to cook.
Return the remaining milk to boil. Pour in the hot egg mixture in a stream, continuing whisking.
Continue whisking (this is important – you do not want the eggs to solidify/cook) until the cream thickens and comes to a boil. Remove from heat and beat in the butter and vanilla.
Pour cream into a stainless steel/ceramic bowl. Press plastic wrap firmly against the surface. Chill immediately and until ready to use.
For Chocolate Pastry Cream (Half Batch Recipe):
Bring ¼ cup (about 50 cl.) milk to a boil in a small pan; remove from heat and add in 3 ounces (about 80 g.) semisweet chocolate, finely chopped, and mix until smooth. Whisk into pastry cream when you add the butter and vanilla.
Bring ¼ cup (about 50 cl.) milk to a boil in a small pan; remove from heat and add in 3 ounces (about 80 g.) semisweet chocolate, finely chopped, and mix until smooth. Whisk into pastry cream when you add the butter and vanilla.
For Coffee Pastry Cream (Half Batch recipe)
Dissolve 1 ½ teaspoons instant espresso powder in 1 ½ teaspoons boiling water. Whisk into pastry cream with butter and vanilla.
Dissolve 1 ½ teaspoons instant espresso powder in 1 ½ teaspoons boiling water. Whisk into pastry cream with butter and vanilla.
Pate a Choux (Yield: About 28)
¾ cup (175 ml.) water
6 Tbsp. (85 g.) unsalted butter
¼ Tsp. salt
1 Tbsp. sugar
1 cup (125 g.) all-purpose flour
4 large eggs
¾ cup (175 ml.) water
6 Tbsp. (85 g.) unsalted butter
¼ Tsp. salt
1 Tbsp. sugar
1 cup (125 g.) all-purpose flour
4 large eggs
For Egg Wash: 1 egg and pinch of salt
Pre-heat oven to 425◦F/220◦C degrees. Line two baking sheets with parchment paper.
Preparing batter:
Combine water, butter, salt and sugar in a saucepan over medium heat. Bring to a boil and stir occasionally. At boil, remove from heat and sift in the flour, stirring to combine completely.
Combine water, butter, salt and sugar in a saucepan over medium heat. Bring to a boil and stir occasionally. At boil, remove from heat and sift in the flour, stirring to combine completely.
Return to heat and cook, stirring constantly until the batter dries slightly and begins to pull away from the sides of the pan.
Transfer to a bowl and stir with a wooden spoon 1 minute to cool slightly.
Add 1 egg. The batter will appear loose and shiny.
As you stir, the batter will become dry-looking like lightly buttered mashed potatoes.
It is at this point that you will add in the next egg. Repeat until you have incorporated all the eggs.
Piping:
Transfer batter to a pastry bag fitted with a large open tip (I piped directly from the bag opening without a tip). Pipe choux about 1 inch-part in the baking sheets. Choux should be about 1 inch high about 1 inch wide.
Transfer batter to a pastry bag fitted with a large open tip (I piped directly from the bag opening without a tip). Pipe choux about 1 inch-part in the baking sheets. Choux should be about 1 inch high about 1 inch wide.
Using a clean finger dipped in hot water, gently press down on any tips that have formed on the top of choux when piping. You want them to retain their ball shape, but be smoothly curved on top.
Brush tops with egg wash (1 egg lightly beaten with pinch of salt).
Baking:
Bake the choux at 425◦F/220◦C degrees until well-puffed and turning lightly golden in color, about 10 minutes.
Bake the choux at 425◦F/220◦C degrees until well-puffed and turning lightly golden in color, about 10 minutes.
Lower the temperature to 350◦F/180◦C degrees and continue baking until well-colored and dry, about 20 minutes more. Remove to a rack and cool.
Can be stored in a airtight box overnight.
Filling:
When you are ready to assemble your piece montée, using a plain pastry tip, pierce the bottom of each choux. Fill the choux with pastry cream using either the same tip or a star tip, and place on a paper-lined sheet. Choux can be refrigerated briefly at this point while you make your glaze.
When you are ready to assemble your piece montée, using a plain pastry tip, pierce the bottom of each choux. Fill the choux with pastry cream using either the same tip or a star tip, and place on a paper-lined sheet. Choux can be refrigerated briefly at this point while you make your glaze.
Use one of these to top your choux and assemble your piece montée.
Chocolate Glaze:
8 ounces/200 g. finely chopped chocolate (use the finest quality you can afford as the taste will be quite pronounced; I recommend semi-sweet)
8 ounces/200 g. finely chopped chocolate (use the finest quality you can afford as the taste will be quite pronounced; I recommend semi-sweet)
Melt chocolate in microwave or double boiler. Stir at regular intervals to avoid burning. Use the best quality chocolate you can afford. Use immediately.
Hard Caramel Glaze:
1 cup (225 g.) sugar
½ teaspoon lemon juice
1 cup (225 g.) sugar
½ teaspoon lemon juice
Combine sugar and lemon juice in a saucepan with a metal kitchen spoon stirring until the sugar resembles wet sand. Place on medium heat; heat without stirring until sugar starts to melt around the sides of the pan and the center begins to smoke. Begin to stir sugar. Continue heating, stirring occasionally until the sugar is a clear, amber color. Remove from heat immediately; place bottom of pan in ice water to stop the cooking. Use immediately.
Assembly of your Piece Montée:
You may want to lay out your unfilled, unglazed choux in a practice design to get a feel for how to assemble the final dessert. For example, if making a conical shape, trace a circle (no bigger than 8 inches) on a piece of parchment to use as a pattern. Then take some of the larger choux and assemble them in the circle for the bottom layer. Practice seeing which pieces fit together best.
You may want to lay out your unfilled, unglazed choux in a practice design to get a feel for how to assemble the final dessert. For example, if making a conical shape, trace a circle (no bigger than 8 inches) on a piece of parchment to use as a pattern. Then take some of the larger choux and assemble them in the circle for the bottom layer. Practice seeing which pieces fit together best.
Once you are ready to assemble your piece montée, dip the top of each choux in your glaze (careful it may be still hot!), and start assembling on your cake board/plate/sheet. Continue dipping and adding choux in levels using the glaze to hold them together as you build up. (You may want to use toothpicks to hold them in place – see video #4 below).
When you have finished the design of your piece montée, you may drizzle with remaining glaze or use ribbons, sugar cookie cut-outs, almonds, flowers, etc. to decorate. Have fun and enjoy! Bon appétit!
Additional Information: Here are some videos you may want to take a look at before you get started on your piece montée.
1) Martha Stewart Assembles a Croquembouche:
http://www.marthastewart.com/recipe/marthas-famous-croquembouche
http://www.marthastewart.com/recipe/marthas-famous-croquembouche
2) Assembling croquembouche using the interior of a cylinder:
http://www.youtube.com/watch?v=Fq-UgMxe0Y4
3) Asembling Free-standing Croquembouche with Chocolate Glaze:
http://www.youtube.com/watch?v=ZrIanD5pi9E&feature=related
http://www.youtube.com/watch?v=Fq-UgMxe0Y4
3) Asembling Free-standing Croquembouche with Chocolate Glaze:
http://www.youtube.com/watch?v=ZrIanD5pi9E&feature=related
4) Assembling a Croquembouche with Toothpicks and Cone:
http://www.youtube.com/watch?v=vIGaidsM-NI&feature=related
http://www.youtube.com/watch?v=vIGaidsM-NI&feature=related
See this google images search of Croquembouche for inspiration:
http://images.google.com/images?hl=en&source=hp&q=croquembouche&btnG=Sea...
http://images.google.com/images?hl=en&source=hp&q=croquembouche&btnG=Sea...
Here’s a link to a dairy-free pate a choux and crème patisserie recipe:
http://dairyfreecooking.about.com/od/dessertsbeverages/r/creampuffs.htm
http://dairyfreecooking.about.com/od/dessertsbeverages/r/creampuffs.htm
lundi 10 mai 2010
Crème renversé?
C'Est le monde a l'envers ici!
Eh oui la routine du militaire qui part est commencé!
Faut se l'avouer, je m'y attendais. Et je ne mens pas en disant que parfois ça fait du bien!!!
Bref il a quitté lundi et depuis la vie ...EST BORDÉLIQUE! mouais!
Les poulets bien que tant attentioné soit ils, me rende la vie dingo! La premiere fois que le militaire a quitté la maison pour de l'entrainement, j'avais 2 poulets, 2 garderies , et une amie plus que vriament extraordinaire! 3 a vrai dire mais une que j'aime appelé ma femme.
Bone tout ça c'Est l'histoire du passé, retournons le gâteaux au présent asteur!
Ma vie je l'ai choisis ainsi. J'aime etre à la maison avec mes poulets et c'Est pas la chance de toutes les mamans du monde! Alors j'en profite!
Puis où je suis ,c'est si merveilleux! Les gens et la nature! WOW!
Doncj'Ai 2 choix;
1- me morfondre et pleurer toutes les larmes de mon corps
OU
2 -Vivre au maximum ,plein d'amour de mes poulets et de mon homme et de mes amis et profité au maximum de mon temps ici...
OPTION 2!!!!!!!
Bonne semaine
mardi 27 avril 2010
Daring Baker: British Pudding
The April 2010 Daring Bakers’ challenge was hosted by Esther of The Lilac Kitchen. She challenged everyone to make a traditional British pudding using, if possible, a very traditional British ingredient: suet.

Ingredients
Method
So to steam a pudding; Using a pas big enough to hold your bowl, fold a towel and place it at the bottom. Place your pudding on top of the towel and poor the hot water until it reaches just the bottom of the bowl. Keep an eye on the water so you don't steam it all! Keep adding as it cooks!!
And here is a link on how to prepare your pudding bowl!
http://www.bbcgoodfood.com/videos/1060/steaming-a-pudding

Golden pudding
Ingredients
120g Butter
120g Caster Sugar
120g Self-Raising Flour
2 Eggs, beaten
2 Tablespoons Maple Syrup
Syrup Sauce:
1 dessertspoon Cornflour
150ml Water
2 tablespoons Maple Syrup
Juice of ½ Lemon
Method
Cream the butter and sugar until light and fluffy. Sift the flour and add to the creamed mixture along with the egg, a little at a time, beating well. Put the golden syrup in the base of a buttered 1.1 litre basin, and pour the sponge mixture carefully over the syrup. Cover securely and steam for 1 ½ - 2 hours. Turn out and serve with Custard and Syrup Sauce.
For The Syrup Sauce:
Mix the corn flour with a little of the water, then add all the other ingredients. Heat in a small pan, stirring all the time until the sauce thickens. Serve hot.
So to steam a pudding; Using a pas big enough to hold your bowl, fold a towel and place it at the bottom. Place your pudding on top of the towel and poor the hot water until it reaches just the bottom of the bowl. Keep an eye on the water so you don't steam it all! Keep adding as it cooks!!
And here is a link on how to prepare your pudding bowl!
http://www.bbcgoodfood.com/videos/1060/steaming-a-pudding
lundi 12 avril 2010
Des nouvelles expresso!
Il y a de ça très très longtemps, j'ai écris jadis!
Bref je dois commencer à être bonne pour un petit update moi la la !
Voici que voilà...
Fils va à l'école et il aime beaucoup. Bien que trouble faiseur à la maison, il semblerait être un élève parfait!Tellement que les professeur, tant soit peu téteux, m'ont demandés s'ils pouvaient envoyés leurs enfants chez moi se faire éduquer. DE KESSÉ??? ais-je doucement répondue?
Donc de cette situation, je suis heureuse que mes effort et mes déchirement crânien aille value la peine!
Pour fille princesse alors la ! OUUUUUFFFF...elle s'affirme disons le ainsi! Toujours aussi créative et mémère que jamais. Elle aime toujours jouer à la poupée et même qu'elle adore mon bébé alive, BBB!!!
Ouin disons que euhhh....elle aime mon bb un peu trop...ah la joie d'être grande soeur.
Et pour BBB ,bien elle a décidé d'être un power BB parce qu'en moins d'une semaine ,elle rampe,s'accroche au meuble ,marche si on la soutient et perce une dent!!! AILLOLE ... voila pourquoi la nouvelle sur elle s'écourte un peu car déjà, juste a l'écrire je suis épuisé!
Et de mon coté bien je suis heureuse que les 4 lbs de chocolat ingéré à pâques soit passé inaperçue!
Bonne semaine à tous!
samedi 27 mars 2010
Daring Baker: TIAN
The 2010 March Daring Baker’s challenge was hosted by Jennifer of Chocolate Shavings. She chose Orange Tian as the challenge for this month, a dessert based on a recipe from Alain Ducasse’s Cooking School in Paris.
TIAN CAKE!

TIAN CAKE!


It was supposed to be an orange -citrus version but due to me not tolerating any citrus form I decided to make a Mango apple caramel Tian!
Pâte Sablé
Ingredients U.S. Imperial Metric Instructions for Ingredients
2 medium-sized egg yolks at room temperature
granulated sugar 6 tablespoons + 1 teaspoon; 2.8 oz; 80 grams
vanilla extract ½ teaspoon
Unsalted butter ¼ cup + 3 tablespoons; 3.5 oz; 100 grams ice cold, cubed
Salt 1/3 teaspoon; 2 grams
All-purpose flour 1.5 cup + 2 tablespoons; 7 oz; 200 grams
baking powder 1 teaspoon ; 4 grams
Directions:
Put the flour, baking powder, ice cold cubed butter and salt in a food processor fitted with a steel blade.
In a separate bowl, add the eggs yolks, vanilla extract and sugar and beat with a whisk until the mixture is pale. Pour the egg mixture in the food processor.
Process until the dough just comes together. If you find that the dough is still a little too crumbly to come together, add a couple drops of water and process again to form a homogenous ball of dough. Form into a disc, cover with plastic wrap and leave to rest in the fridge for 30 minutes.
Preheat your oven to 350 degree Fahrenheit.
Roll out the dough onto a lightly floured surface until you obtain a ¼ inch thick circle.
Using your cookie cutter, cut out circles of dough and place on a parchment (or silicone) lined baking sheet. Bake for 20 minutes or until the circles of dough are just golden.
Mango Jam
2 mangos
400 grams of sugar
one vanilla pod
Direction:
Peel the mango and cube them
Pour sugar on mangos
Take the vanilla pod and open it in 2 and scrape the seeds and drop them on top of the mangos .Add the pod too.
Let rest for 4-5 hours
Then cook at medium low for about 45 minutes!
Caramel Mangos
Cut about 1 or 2 mangos in cube and pour caramel on top.Let sit overnight.
For the Caramel:
Ingredients U.S. Metric Imperial Instructions for Ingredients
granulated sugar 1 cup; 7 oz; 200 grams
apple juice 1.5 cups + 2 tablespoons; 14 oz; 400 grams
granulated sugar 1 cup; 7 oz; 200 grams
apple juice 1.5 cups + 2 tablespoons; 14 oz; 400 grams
Direction
Place the sugar in a pan on medium heat and begin heating it.
Once the sugar starts to bubble and foam, slowly add the apple juice. As soon as the mixture starts boiling, remove from the heat and pour half of the mixture over the mangos.
Reserve the other half of the caramel mixture in a small bowl — you will use this later to spoon over the finished dessert. When the dessert is assembled and setting in the freezer, heat the kept caramel sauce in a small saucepan over low heat until it thickens and just coats the back of a spoon (about 10 minutes). You can then spoon it over the orange tians.
[Tip: Be very careful when making the caramel — if you have never made caramel before, I would suggest making this step while you don’t have to worry about anything else. Bubbling sugar is extremely, extremely hot, so make sure you have a bowl of ice cold water in the kitchen in case anyone gets burnt!]
For the Whipped Cream:
Ingredients U.S. Metric Imperial Instructions for Ingredients
heavy whipping cream 1 cup; 7 oz; 200 grams
3 tablespoons of hot water
1 tsp Gelatine
1 tablespoon of confectioner's sugar
mango jam (see recipe above) 1 tablespoon
heavy whipping cream 1 cup; 7 oz; 200 grams
3 tablespoons of hot water
1 tsp Gelatine
1 tablespoon of confectioner's sugar
mango jam (see recipe above) 1 tablespoon
Direction
In a small bowl, add the gelatine and hot water, stirring well until the gelatine dissolves. Let the gelatine cool to room temperature while you make the whipped cream. Combine the cream in a chilled mixing bowl. Whip the cream using a hand mixer on low speed until the cream starts to thicken for about one minute. Add the confectioner sugar. Increase the speed to medium-high. Whip the cream until the beaters leave visible (but not lasting) trails in the cream, then add the cooled gelatine slowly while beating continuously. Continue whipping until the cream is light and fluffy and forms soft peaks. Transfer the whipped cream to a bowl and fold in the mango jam.
[Tip: Use an ice cold bowl to make the whipped cream in. You can do this by putting your mixing bowl, cream and beater in the fridge for 20 minutes prior to whipping the cream.]
[Tip: Use an ice cold bowl to make the whipped cream in. You can do this by putting your mixing bowl, cream and beater in the fridge for 20 minutes prior to whipping the cream.]
Assembling the Dessert:
Make sure you have some room in your freezer. Ideally, you should be able to fit a small baking sheet or tray of desserts to set in the freezer.
Line a small tray or baking sheet with parchment paper or a silicone sheet. Lay out 6 cookie cutters onto the parchment paper/silicone.
Drain the caramel mango on a kitchen towel.
Have the jam, whipped cream and baked circles of dough ready to use.
Arrange thecaramel mango at the bottom of each cookie cutter. Make sure the segments all touch either and that there are no gaps. Make sure they fit snuggly and look pretty as they will end up being the top of the dessert. Arrange them as you would sliced apples when making an apple tart.
Once you have neatly arranged one layer of mango segments at the bottom of each cookie cutter, add a couple spoonfuls of whipped cream and gently spread it so that it fills the cookie cutter in an even layer. Leave about 1/4 inch at the top so there is room for dough circle.
Using a butter knife or small spoon, spread a small even layer of orange marmalade on each circle of dough.
Carefully place a circle of dough over each ring (the side of dough covered in mango jam should be the side touching the whipping cream). Gently press on the circle of dough to make sure the dessert is compact.
Place the desserts to set in the freezer to set for 10 minutes.
Using a small knife, gently go around the edges of the cookie cutter to make sure the dessert will be easy to unmold. Gently place your serving plate on top of a dessert (on top of the circle of dough) and turn the plate over. Gently remove the cookie cutter, add a spoonful of caramel sauce and serve immediately.
Have fun!!
dimanche 28 février 2010

Daring Baker: TIRAMISU

The February 2010 Daring Bakers’ challenge was hosted by Aparna of My Diverse Kitchen and Deeba of Passionate About Baking. They chose Tiramisu as the challenge for the month. Their challenge recipe is based on recipes from The Washington Post, Cordon Bleu at Home and Baking Obsession.
It's actually quite simple!!! LOVED IT!!
Simply go step by step and it's simple!
MASCARPONE CHEESE
(Source: Vera’s Recipe for Homemade Mascarpone Cheese)
This recipe makes 12oz/ 340gm of mascarpone cheese
This recipe makes 12oz/ 340gm of mascarpone cheese
Ingredients:
474ml (approx. 500ml)/ 2 cups whipping (36 %) pasteurized (not ultra-pasteurized), preferably organic cream (between 25% to 36% cream will do)
1 tablespoon fresh lemon juice
474ml (approx. 500ml)/ 2 cups whipping (36 %) pasteurized (not ultra-pasteurized), preferably organic cream (between 25% to 36% cream will do)
1 tablespoon fresh lemon juice
Method:
Bring 1 inch of water to a boil in a wide skillet. Reduce the heat to medium-low so the water is barely simmering. Pour the cream into a medium heat-resistant bowl, then place the bowl into the skillet. Heat the cream, stirring often, to 190 F. If you do not have a thermometer, wait until small bubbles keep trying to push up to the surface.
It will take about 15 minutes of delicate heating. Add the lemon juice and continue heating the mixture, stirring gently, until the cream curdles. Do not expect the same action as you see during ricotta cheese making. All that the whipping cream will do is become thicker, like a well-done crème anglaise. It will cover a back of your wooden spoon thickly. You will see just a few clear whey streaks when you stir. Remove the bowl from the water and let cool for about 20 minutes. Meanwhile, line a sieve with four layers of dampened cheesecloth and set it over a bowl. Transfer the mixture into the lined sieve. Do not squeeze the cheese in the cheesecloth or press on its surface (be patient, it will firm up after refrigeration time). Once cooled completely, cover with plastic wrap and refrigerate (in the sieve) overnight or up to 24 hours.
Vera’s notes: The first time I made mascarpone I had all doubts if it’d been cooked enough, because of its custard-like texture. Have no fear, it will firm up beautifully in the fridge, and will yet remain lusciously creamy.
Keep refrigerated and use within 3 to 4 days.
For the zabaglione:
2 large egg yolks
3 tablespoons sugar/50gms
1/4 cup/60ml Marsala wine (or port or coffee)
1/4 teaspoon/ 1.25ml vanilla extract
1/2 teaspoon finely grated lemon zest
2 large egg yolks
3 tablespoons sugar/50gms
1/4 cup/60ml Marsala wine (or port or coffee)
1/4 teaspoon/ 1.25ml vanilla extract
1/2 teaspoon finely grated lemon zest
Method:
For the zabaglione:
Heat water in a double boiler. If you don’t have a double boiler, place a pot with about an inch of water in it on the stove. Place a heat-proof bowl in the pot making sure the bottom does not touch the water.
In a large mixing bowl (or stainless steel mixing bowl), mix together the egg yolks, sugar, the Marsala (or espresso/ coffee), vanilla extract and lemon zest. Whisk together until the yolks are fully blended and the mixture looks smooth.
Transfer the mixture to the top of a double boiler or place your bowl over the pan/ pot with simmering water. Cook the egg mixture over low heat, stirring constantly, for about 8 minutes or until it resembles thick custard. It may bubble a bit as it reaches that consistency.
Let cool to room temperature and transfer the zabaglione to a bowl. Cover and refrigerate at least 4 hours or overnight, until thoroughly chilled.
For the vanilla pastry cream:
1/4 cup/55gms sugar
1 tablespoon/8gms all purpose flour
1/2 teaspoon finely grated lemon zest
1/2 teaspoon/ 2.5ml vanilla extract
1 large egg yolk
3/4 cup/175ml whole milk
1/4 cup/55gms sugar
1 tablespoon/8gms all purpose flour
1/2 teaspoon finely grated lemon zest
1/2 teaspoon/ 2.5ml vanilla extract
1 large egg yolk
3/4 cup/175ml whole milk
For the pastry cream:
Mix together the sugar, flour, lemon zest and vanilla extract in a medium heavy-bottomed saucepan. To this add the egg yolk and half the milk. Whisk until smooth.
Now place the saucepan over low heat and cook, stirring constantly to prevent the mixture from curdling.
Add the remaining milk a little at a time, still stirring constantly. After about 12 minutes the mixture will be thick, free of lumps and beginning to bubble. (If you have a few lumps, don’t worry. You can push the cream through a fine-mesh strainer.)
Transfer the pastry cream to a bowl and cool to room temperature. Cover with plastic film and refrigerate at least 4 hours or overnight, until thoroughly chilled.
For the whipped cream:
1 cup/235ml chilled heavy cream (we used 25%)
1/4 cup/55gms sugar
1/2 teaspoon/ 2.5ml vanilla extract
1 cup/235ml chilled heavy cream (we used 25%)
1/4 cup/55gms sugar
1/2 teaspoon/ 2.5ml vanilla extract
For the whipped cream:
Combine the cream, sugar and vanilla extract in a mixing bowl. Beat with an electric hand mixer or immersion blender until the mixture holds stiff peaks. Set aside.
Combine the cream, sugar and vanilla extract in a mixing bowl. Beat with an electric hand mixer or immersion blender until the mixture holds stiff peaks. Set aside.
To assemble the tiramisu:
Have ready a rectangular serving dish (about 8" by 8" should do) or one of your choice.
Mix together the warm espresso, rum extract and sugar in a shallow dish, whisking to mix well. Set aside to cool.
In a large bowl, beat the mascarpone cheese with a spoon to break down the lumps and make it smooth. This will make it easier to fold. Add the prepared and chilled zabaglione and pastry cream, blending until just combined. Gently fold in the whipped cream. Set this cream mixture aside.
Now to start assembling the tiramisu.
Workings quickly, dip 12 of the ladyfingers in the sweetened espresso, about 1 second per side. They should be moist but not soggy. Immediately transfer each ladyfinger to the platter, placing them side by side in a single row. You may break a lady finger into two, if necessary, to ensure the base of your dish is completely covered.
Spoon one-third of the cream mixture on top of the ladyfingers, then use a rubber spatula or spreading knife to cover the top evenly, all the way to the edges.
Repeat to create 2 more layers, using 12 ladyfingers and the cream mixture for each layer. Clean any spilled cream mixture; cover carefully with plastic wrap and refrigerate the tiramisu overnight.
To serve, carefully remove the plastic wrap and sprinkle the tiramisu with cocoa powder using a fine-mesh strainer or decorate as you please. Cut into individual portions and serve.
S'abonner à :
Commentaires (Atom)